The hardest part was probably figuring out items in the software, but it's pretty straightforward: import stl, position item on print bed, configure supports, slice and save on usb stick. I see other reviewers complaining on here, but it's possible they weren't printing on a level surface, or had mismatched parameters with their resin type. Resins will advertise their exposure times and other parameters. These parameters must match up when you are configuring the slicing profile or else it may spend too little time curing the resin on each layer. I think people here are expecting it to be as easy and straightforward as FDM printers.
I have several filament printers, but this is my first SLA printer. I'm glad I knew this was a rebranded Wanhao D7 Plus, because this printer came with software instructions, but nothing about actually using it. As it is my first experience with SLA, I was a little confused. I knew how it worked, but I had several failed prints until I google the Wanhao and learned a b it about it and orienting and preparing prints for SLA. I suggest you Google that printer if you need some step by step unboxing and setup instructions because there are several very detailed ones.
Once I learned how to use the printer, I actually was able to reprint most of the failed prints successfully. SLA printers can't print everything a filament printer can print because they print differently. They are also more expensive to run, so most people use them for work that needs to be extremely detailed or high-quality prototyping and casting.
You also really need to read about the proper procedures for using and storing and cleaning resins. Some of the resins used in SLA are quite toxic, and all of them are quite messy. There is a little about this in the package, but not enough. Maybe this printer isn't aimed at beginners.
Once you get the printer to run and figure out what kind of things it prints the best, it actually is a really nice printer, though I think the touch screens menus are a bit clunky. You have to search around for a lot of it (but as far as I can tell, the Wanhao has the same menu and a larger following, so you can usually find what you need by searching for that). Another downside is that the slicing software. Creation workshop is just a basic slicer and it won't do anything fancy. A quick forum browse seems to suggest that limitations of the program are sometimes a cause of failed prints (and there are lots of free software workarounds to be offered up for most problems you have), so I wouldn't really call this a plug and play, no fail printer.
That being said, I own several filament printers and only one of them would I call plug and play, and that one is all proprietary everything and a real chore to buy anything for. The other ones are for people who like to tinker and solve problems. This printer actually can get amazing detail, spectacularly small parts and great prints with some tinkering and working around some of the limitations. I do think there's a learning curve with all kinds of 3d printing. It's what I (and you should) expect from a 3d printer.
If you are new to 3d printing and just want something to print some cool things from Thingiverse, get a filament printer. If you know why you want an SLA printer and don't mind tinkering a bit, I think this is a fine printer.
I deducted a star for not including basic operating instructions. That's not excusable for such a sensitive piece of equipment.
I am blown away by the quality of this resin Printer. I have attached images of my first print out of this printer, and while it has a few print issues; they're entirely user created by my not having enough support structures. Now if you haven't used a Resin based printer before, the process of printing is much much different then you're typical FFD printer. I will address those concerns for anyone who may be struggling in a moment. But just from a usability of the printer itself, and the print quality. This is a homerun, especially for the price. Now the print volume is rather small, but these printers really lend themselves to smaller items because of their high print resolution. The printer comes with a little tub that while not listed I used as a container for my isopropyl alcohol and the rinsing portion of print cleanup. I've seen some online use it to pour the resin from the vat into rather then back into the original container.
My printer came with a dark gray resin that does look really nice. But if you want your prints to hold up over long time without degrading too bad you will want to hit your prints with some spray paint. The resin after printing and rinsing/cleaning requires further curing in UV light. The easy thing to do is place it out in the sun. You can also get a UV curing box like what is used at nail salons to do the same thing. However this material continues to react with UV light so if its not painted its going to eventually end up getting really brittle. So just be aware. But these are just par for the course with Resin printing.
On the topic of resin printing; there are some massive differences between Resin and FFD prints. For starters, you are really going to want to learn how to use additional softwares in addition to the Creation Desktop software that this printer ships with. Creation desktop is used to add supports and slice the model to be put on the USB drive that plugs into the back of the printer that it pulls prints from. However if I could rate the provided software seperate from this printer I would give it a 1star. It is buggy (Many times I've sliced something and when I preview the sliced layers they have artifacts in them) it is really slow. I have a 4.2ghz i7 and 32gb of ram and an m.2 drive, and the Hellboy that I posted pictures above took about 20 minutes to slice. If you have a more "regular" computer I would hate to think how long its going to take for it to slice something. The other issue with the software is that the support structures are honestly pretty bad. You are much better off grabbing Autodesk Meshmixer and learning how to use that to prep your models, things like hollowing, orienting, and support structure generation and placement. I know another popular free software out there that people use is B9 Creator. So my main advice I would give anyone wanting to purchase this printer, or any resin printer, would be to look into and plan on learning one of those softwares, because the provided slicer is not a one stop shop, your success will be heavily dependent on your use of these programs to prep and slice your files.
One big tip: When you start a print you have to tell it to home first. It will not by default home on its own unless you add that gcode yourself in your slicer. I made the mistake on my very first print of letting it run for a few hours and then when I went to check on it I found out that nothing had happened because the print bed was at the top because I never homed it.
If you want an affordable DLP/SLA printer but don't want to sacrifice print quality. You can't go wrong here!
This Monoprice Mini Deluxe SLA Resin UV 3D Printer is my first foray into resin 3D printing. Although I have been 3D printing with filament printers for 3 years now, there was still a learning curve with this printer because the process is very different.
First off, this is the Deluxe model. Monoprice also offers a lower end model that is very similar for $100 less but I strongly suggest buying the Deluxe if at all possible because of the onboard touch screen and the fact that it is a stand-alone printer. The other model must be connected to a computer to run and if you get any kind of pop-up (like a Windows update or an antivirus scan reminder), it can ruin your print. There are also other, less obvious, upgrades like better z-axis stabilization that make the Deluxe model a somewhat better printer (although you can do those upgrades yourself) and much more user-friendly.
Also, this is a rebranded Wanhao D7 Plus (v 1.5). This is important because it's been out longer and there are users groups and online videos and documentation that you will want to access when learning to print and when you have issues (and you WILL have issues because that is the nature of 3D printing.)
Next, understand that printing with resin is messy, no matter how careful you are. The resin can and will drip and spill and it just seems to go everywhere. Isopropyl alcohol (IPA) is the only thing that cleans it up and you will use lots of this. (If you are outside the US, denatured alcohol works the same way.) Not only does it clean up drips, you must use it to wash your prints and your build plate. 91% IPA works better/faster than 70%, BTW. https://www.amazon.com/gp/product/B072PVPR1Z/
You want to keep the resin off of your hands so you'll use a lot of disposable gloves. I like these but any disposable nitrile gloves will work fine. Be sure they are nitrile because resin degrades latex gloves. https://www.amazon.com/AMMEX-GWBN46100-BX-Nitrile-Gloveworks-Disposable/dp/B01G346JJ2/ The resin also has a strong, chemical smell so locating the printer in a well-ventilated room is a good idea. TIP: If you have an IKEA near you, the SUNNERSTA utility cart for $29.99 is almost tailor-made for this printer. If you install the shelves upside down, they all have a lip that will keep things from rolling off. The top shelf holds the printer perfectly with room to spare and the bottom shelves are handy for holding ISA, resin, gloves, paper towels, etc. and the cart has two wheels so you can move it out of the way when not printing.
You'll also use A LOT of paper towels and I have found that placing a puppy training pad underneath the printer is very helpful. It absorbs drips and protects your works surface and saves on paper towel use. https://www.amazon.com/American-Kennel-Club-AKC-62920/dp/B00FNITSWU/
Finally, you'll have to buy liquid resin and it's more expensive than ordinary 3D printer filament. The printer comes with one, 250ml bottle of resin. (The product page says you'll get red but I got grey.) After that, you can buy 250ml bottles on the Monoprice website for ~$17. Note that different brands and different colors require different settings. You can find the settings for many resins on the Facebook Wanhao D7 Plus users group.
This SLA (stereolithography) printer uses liquid resin as the printing material and it prints by exposing the resin to UV light, layer by layer, until the model is complete. The light source is on the bottom of the printer. Because the sun also emits UV light, you want to avoid exposing your liquid resin to sunlight to prevent it from beginning to cure. There are two other types of resin printers currently on the market that use laser or DLP (digital light processing) rather than UV. They are generally more difficult to repair and upgrade. This printer is designed to be easy to work on.
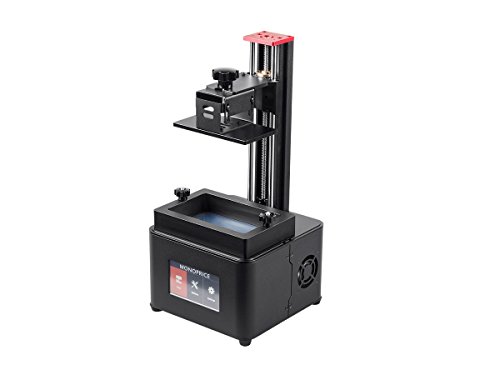
In the box comes the printer (which is almost completely assembled), the cover for the printer, a user manual, a bottle of resin, a plastic scraper, a hex driver, a small wash jar with lid, a brief user manual, power cord, an extra FEP sheet and a thumb drive that has the slicing software and a couple of models on it. It's very well packed so damage would be unlikely. It's heavy for its size but compact. Setting it up is simple - just screw in the build plate in place and screw the resin vat in place (after removing the foam.) Then you'll need to install the Creative Workshop software on your computer.
There are two models on the thumb drive that you can print right away and I suggest doing so to make sure the printer is working properly. To do this, you'll need to level the print bed, which is easy to do and won't have to be done very often. Then wipe and dry the build plate and the FEP film with isopropyl alcohol, put gloves on and pour some resin in the vat - not more than 1/3 or so full - and put the cover on the printer. You want to keep the cover in place all the time, except when you are adding resin, removing a print, etc., to prevent ambient UV light from beginning to cure the resin in the vat. Next, plug the thumb drive into the back and turn it on. Using the touchscreen on the front, home the print bed and then touch the Print button. Choose one of the two models on the thumb drive and start printing. The models are already optimally positioned and sliced and both printed perfectly.
When it's finished, remove the print from the print bed using the included plastic scraper, again, wearing gloves. This is a very messy process and includes scraping the extra resin still on the print bed back into the tank for use again. Place the printed model into the wash container filled with isopropyl alcohol and swirl it around to clean off the excess resin. You will also want to clean your build plate with isopropyl alcohol as it will still have a lot of resin on it. I use a Tupperware container filled with IPA for this. I strongly suggest watching a few of the many videos on YouTube that demonstrate this process.
After your print is washed, you must finish curing it by placing it out in direct sunlight or in a cure box. You can make your own cure box very easily and inexpensively with a small plastic bucket and a strip of UV LED lights. There are directions for doing this on the internet.
Using the Creative Workshop software to slice your own models or models you find on Thingiverse or My Mini Factory or elsewhere has a definite learning curve. There are tutorials on the internet and on the Monoprice website and it pays to watch a few before starting. It's good software but it's not super intuitive and it's finicky. (Hint: Load a model and position it and generate supports and then save the model. After saving, slice it but do NOT re-save the model. Then just copy the model to your thumb drive for printing.) Positioning and supports are critical to a successful print, just like in filament 3D printing. Other things can prevent a successful print, too, like bits of cured resin still in the vat or on the build plate or exposure time that is too long or too short. Again, there is a learning curve, even if you have been 3D printing for years. There is an update currently available for Creative Workshop that seems to be easier to use and if you get the update from the Wanhao website, it will be pre-configured.
On the Wanhao website, you can register for Wanhao University, which is a free, online resource for using, troubleshooting, upgrading and repairing the Wanhao D7 Plus, which is what this printer is. Between the Facebook group and Wanhao University, there is plenty of support and community to turn to for help with any issues you may have.
My first print failed as I had saved the file in Creative Workshop after slicing. My second print failed because there was apparently some cured resin in the vat from the first failed print and that caused the second print to fail. After cleaning the tank and starting again, my third print was successful. One other issue I encountered was that the LCD screen not responding properly but it just needed to be calibrated by tapping in the upper right-hand corner of the screen rapidly until it beeps. This is par for the course with 3D printing of any kind. There are so many variables and things to remember to achieve a successful print but once you get the hang of it, this printer creates beautiful and highly detailed prints.
I'm very excited about this printer because of the insanely detailed prints. It won't replace my FDM printers because they have a larger print volume and filament is less expensive and some filaments produce a much stronger print. But for certain kinds of models, like jewelry and miniatures, the difference is like night and day. You can actually get prints that are so finely detailed, they can be used for making molds. The ability to print objects with such incredible detail is just so gratifying. A maker's dream.
This is my first SLA printer (I'm primarily an FDM guy), and it's definitely a different world. First off, this printer has a much smaller footprint than most FDM printers - by more than half, actually - so if work space is a factor for you, that's a big advantage with this one. The Mini Deluxe is built really, really well, with all steel or aluminum parts, and there's no wiggling anywhere. The wife even mentioned that it looked "sleek" with the cover on.
One of the things that caught me off guard is the resin for the printer smells quite a bit, even with the cover on the machine. The other thing is printing with an SLA printer is kind of a messy process. You're going to need multiple sets of latex gloves, a roll of paper towels, a bottle of rubbing alcohol (to clean your prints with), and a ventilated work area to do it all in.
Also, Monoprice's included slicer software is just terrible. *Terrible.* It's as buggy as they come, and about half the time, it wouldn't produce a file the Mini would understand. I'd definitely recommend going with B9Creator (which is free) instead. However, my biggest complaint is there's no direct connection to the printer from a computer, so you have to open your model, slice it, save the .cws file to a USB drive, and then plug it into the back of the Mini. Then you get to navigate the Mini's touchscreen interface which initially looks well-built, but after you use it for 30 seconds, you'll notice it's buggy as well. I definitely prefer being able to use Cura to just connect with my printer and get things rolling.
The biggest problem is the prints are really awesome, especially compared to an FDM print. That means I can't just give up on SLA - I'm going to have to keep going, especially since I had a friend looking at a carabiner I made say "You *printed* this??" I've already bought 3 more bottles of resin.

Feature Product
- Fast Printing: This SLA printer can print up to 30mm/hour vertically, making it comparable in speed to ordinary FDM/FFF printers.
- LCD Touchscreen: With features like the built-in LCD touchscreen interface, stand alone printing, and guided leveling, this 3D resin printer offers industry standard capabilities at a far lower cost.
- Auto Support Generator: The software supplied with the MP Mini SLA 3D Printer has the ability to automatically generate any support elements needed. Simply import your 3D model and click a single button to generate all necessary supports.
- Size Matters: vWith a layer height of 20 microns, this printer is able to produce 3D prints with details as fine as 1/5 the width of a human hair.
- Ultra High Resolution: This SLA LCD printer is capable of the printing at the highest resolutions, up to 20 microns, where most competitors are limited to 50 microns. It can print with negative gaps (holes) as small as 30 microns, making it ideal for applications where the highest level of detail is required, such as jewelry and dental prototyping.
- Projection Size - 5.5 inches LCD
Description
Expand your prototyping possibilities with ultra high resolution 3D printing. The MP mini Deluxe SLA LCD resin printer is a high resolution desktop machine that matches the print quality of large, industrial printers at a far lower cost. The MP mini Deluxe SLA uses stereo lithography (SLA) technology to achieve a professional print quality that plastic extrusion printers just can't match. Stereo lithography is the gold standard for accuracy and resolution in 3D printing. Ultra high resolution: this SLA LCD printer is capable of the printing at the highest resolutions, up to 20 microns, where most competitors are limited to 50 microns. It can print with negative gaps (holes) as small as 30 microns, making it ideal for applications where the highest level of detail is required, such as jewelry and dental prototyping. Fast printing: this SLA printer can print up to 30mm/hour vertically, making it comparable in speed to ordinary FDM/FFF printers. Lcd touchscreen: with features like the built-in LCD touchscreen interface, stand alone printing, and guided leveling, this 3D resin printer offers industry standard capabilities at a far lower cost. Auto support generator: the software supplied with the MP mini SLA 3D printer has the ability to automatically generate any support elements needed. Simply import your 3D 130994 and click a single button to generate all necessary supports. Size matters: with a layer height of 20 microns, this printer is able to produce 3D prints with details as fine as 1/5 the width of a human hair.
